Setting up internet connection in ubuntu is quite straight forward.
Click on system => administration => network to access the settings to configure your network.
If you are using wired cable connection, it will auto detect and absolutely no settings like in windows.
As for ADSL connections, you will need to google search on how to configure the settings to connect to the broadband.
I will list out some of the different ways to connect using ubuntu.
1) Connect using wvdial.conf
In ubuntu, there is a text command that will create a internet connection. This is mainly used in PPPoe devices, In layman's terms, broadband in a sim card using a usb dongle.
Here's how to bring out the config.
open up the terminal
Navigate to the
etc folder.
type cd .. [ do it twice ]
type cd etc
type sudo gedit wvdial.conf
Key in your password [ nothing will be displayed as you key in the password, hit enter when you are done]
A notepad will show up with these
[Dialer Defaults]
Phone =
Username =
Password =
New PPPD = yes
Simply insert this entire chunk below
[Dialer yourispname]
Init2 = ATQ0 V1 E1 S0=0 &C1 &D2 +FCLASS=0
Stupid Mode = 1
Modem Type = Analog Modem
Phone = *99***16#
ISDN = 0
Username = vodafone
Dial Command = ATDT
Init1 = ATZ
Password = password
Modem = /dev/ttyUSB0
Baud = 460800
Init4 = AT+CGDCONT=1,"IP","sunsurf"
Those in bold means that you need to replace with your own settings. As for the phone number, you can check the number by entering windows to look at it. It is in the "connect to" settings.

The user name and password don't really matter, but you have to write something. it can also be seen via windows, as for password, it can be anything.
As the the last init4 string, You can opt to omit that string, but it would be better to check out your ISP APN. It would make the connection connect faster if you are able to specfiy the APN. This APN can usually be googled online with regards to your ISP.
Also, the last entry has to be keyed in manually, If you copy it off my blog and paste it to the wvdial.conf. Surprisingly, it will fail to send command. Strange bug.
Once you are done, save notepad and run the command off the terminal
wvdial yourispname
You will see as the screen shot and you will be able to surf by starting the firefox. Remember to uncheck the "work online" in the file menu.

2) Connect using Wifi wireless network
If you have a wireless device connected, the network manager on the top right hand corner will show wireless signals around the area. Just Key in the WEP Key or passphrase as you would in windows and it will connect.
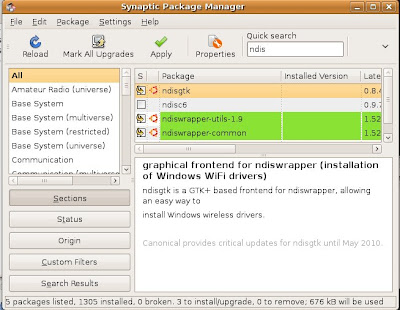
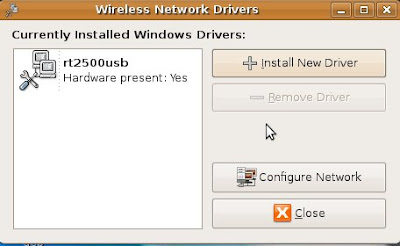
If the wireless device driver is missing, you can make use of the windows drivers to start up the device, there is a program called ndiswrapper that you can install from the add/remove menu. Simply copy the entire driver CD that contains the drivers to an empty folder, Use the terminal and type sudo ndisgtk. This will bring up a graphical user interface of the ndiswrapper program. Navigate to the folder that contains the drivers. Choose the driver file which is usually an inf file and you should see that the device is working properly.
2.1) Download the ndiswrapper first

2.2) Type sudo ndisgtk
You will have to wait for the program to load. Click on install new driver. Select file, click on browse. As you can see, I am using linksys as an example.
This is actually the windows driver file. Just navigate as you would in windows to pick out the driver file.
2.3) Check if hardware is present.

2.4) Connect using the network manager at the top right hand corner


2.4) Connect using the network manager at the top right hand corner

3) Connect using Wicd, This program is another alternative to the default connecting program - network manager. You may wish to try this if using the network manager fail to connect for you. First, you have to download the deb package off the wicd site.

Next you will need to remove the network manager totally. Remove it by starting the add/remove manager. Uncheck it and apply.
Also paste this command in the terminal to finish off the removal

Next you will need to remove the network manager totally. Remove it by starting the add/remove manager. Uncheck it and apply.
Also paste this command in the terminal to finish off the removal
sudo apt-get purge network-manager-gnome
Do a restart and you can double click on the wicd deb file to install wicd.


1 comment:
grasias hermano....funciono!!! en serio me fue de gran ayuda tu informacion
Post a Comment